Considerations about the installation
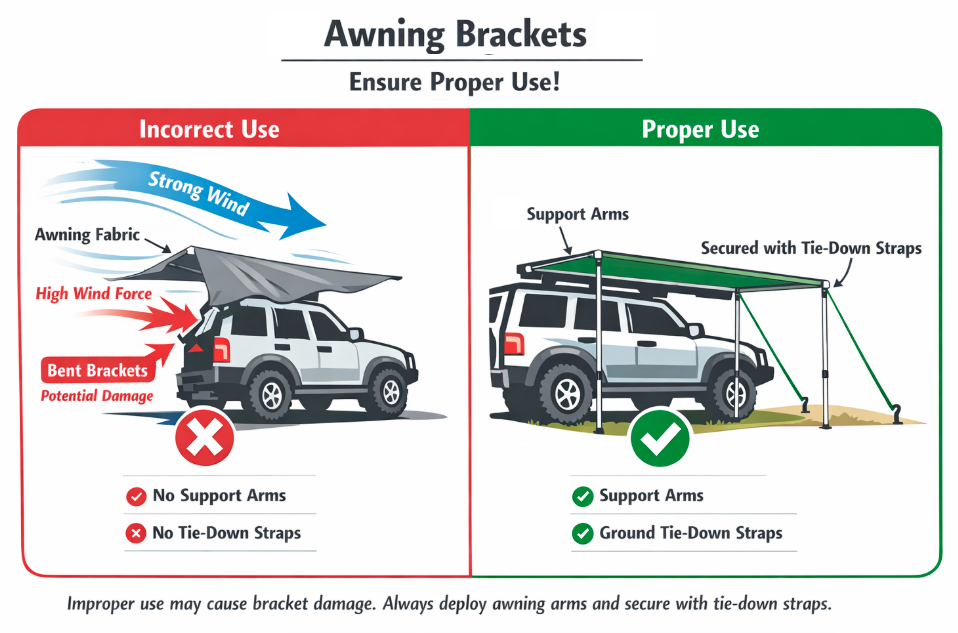
Proper Use
None of our gutter mounted awning brackets are designed to support any Freestanding or swing out awnings with rigid arms.
Fiamma/Thule/Dometic so called hardshell or box awnings are supported by OZ19/OZ20 as long as the lenght/weight ratio proportion of brackets is followed with a common sense installation.
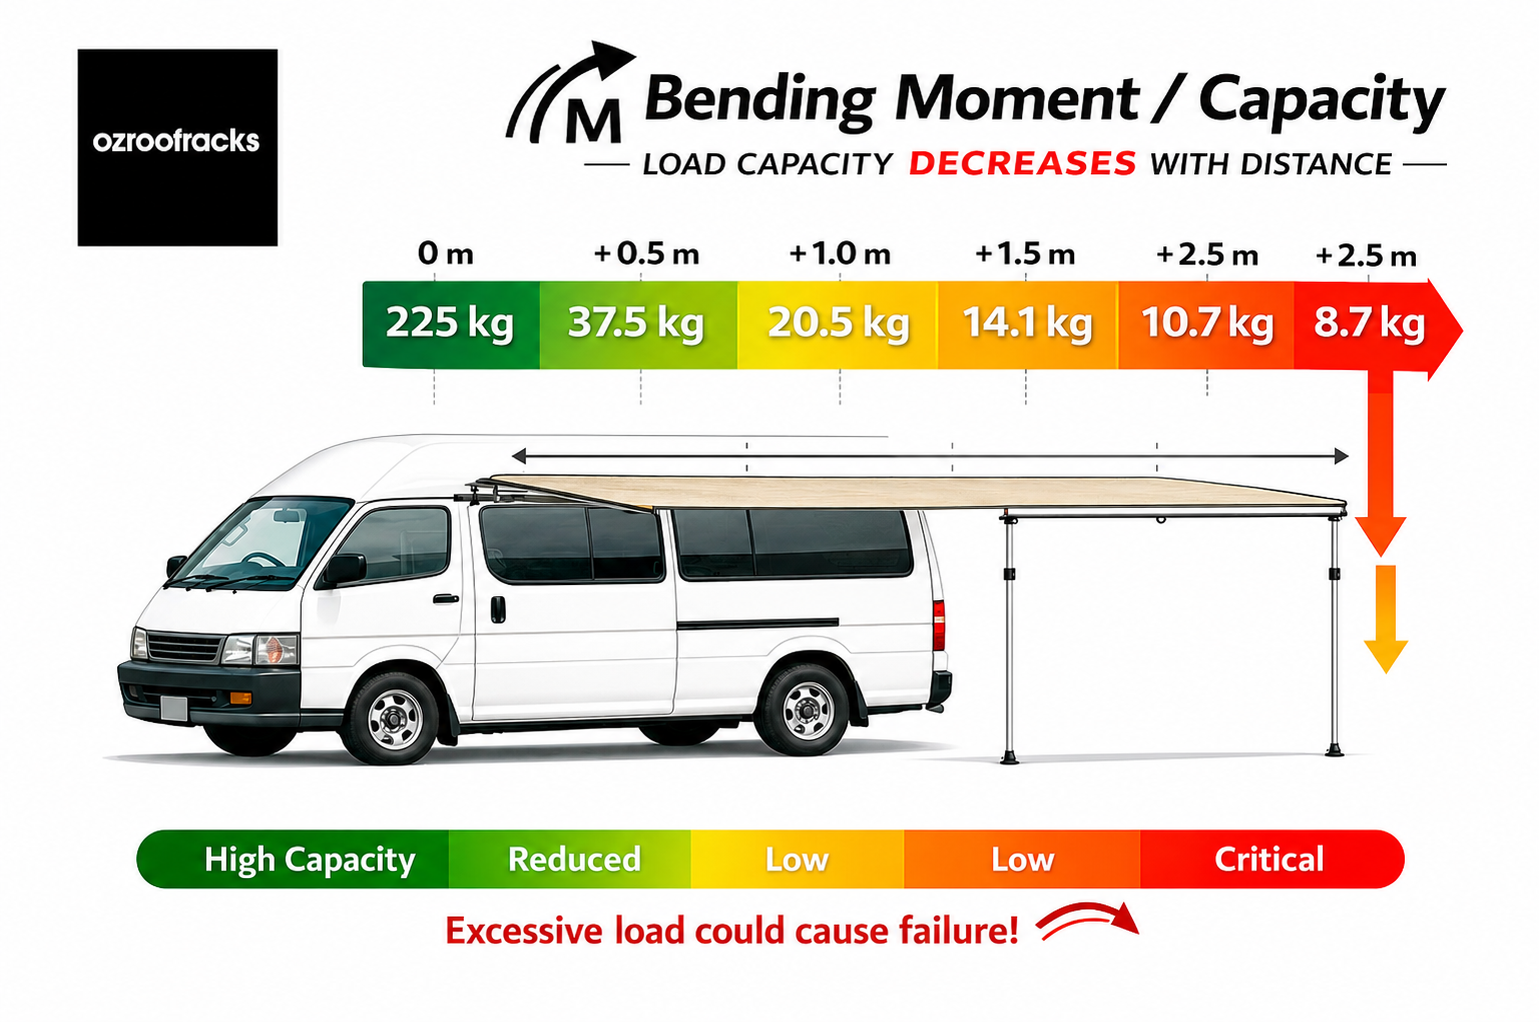
Bending Moment
Once you rollout your awning the bending moment change as you put the weight away from the gutter the bracket stress so always add poles and tie downs and retract your awning if any wind as wind can change the scenario really quick.
Follow manufacturer instructions: roll the awning out no further than 1 metre. Do not extend it fully without support, as the weight can strain the vehicle wall and stress the brackets/gutter.
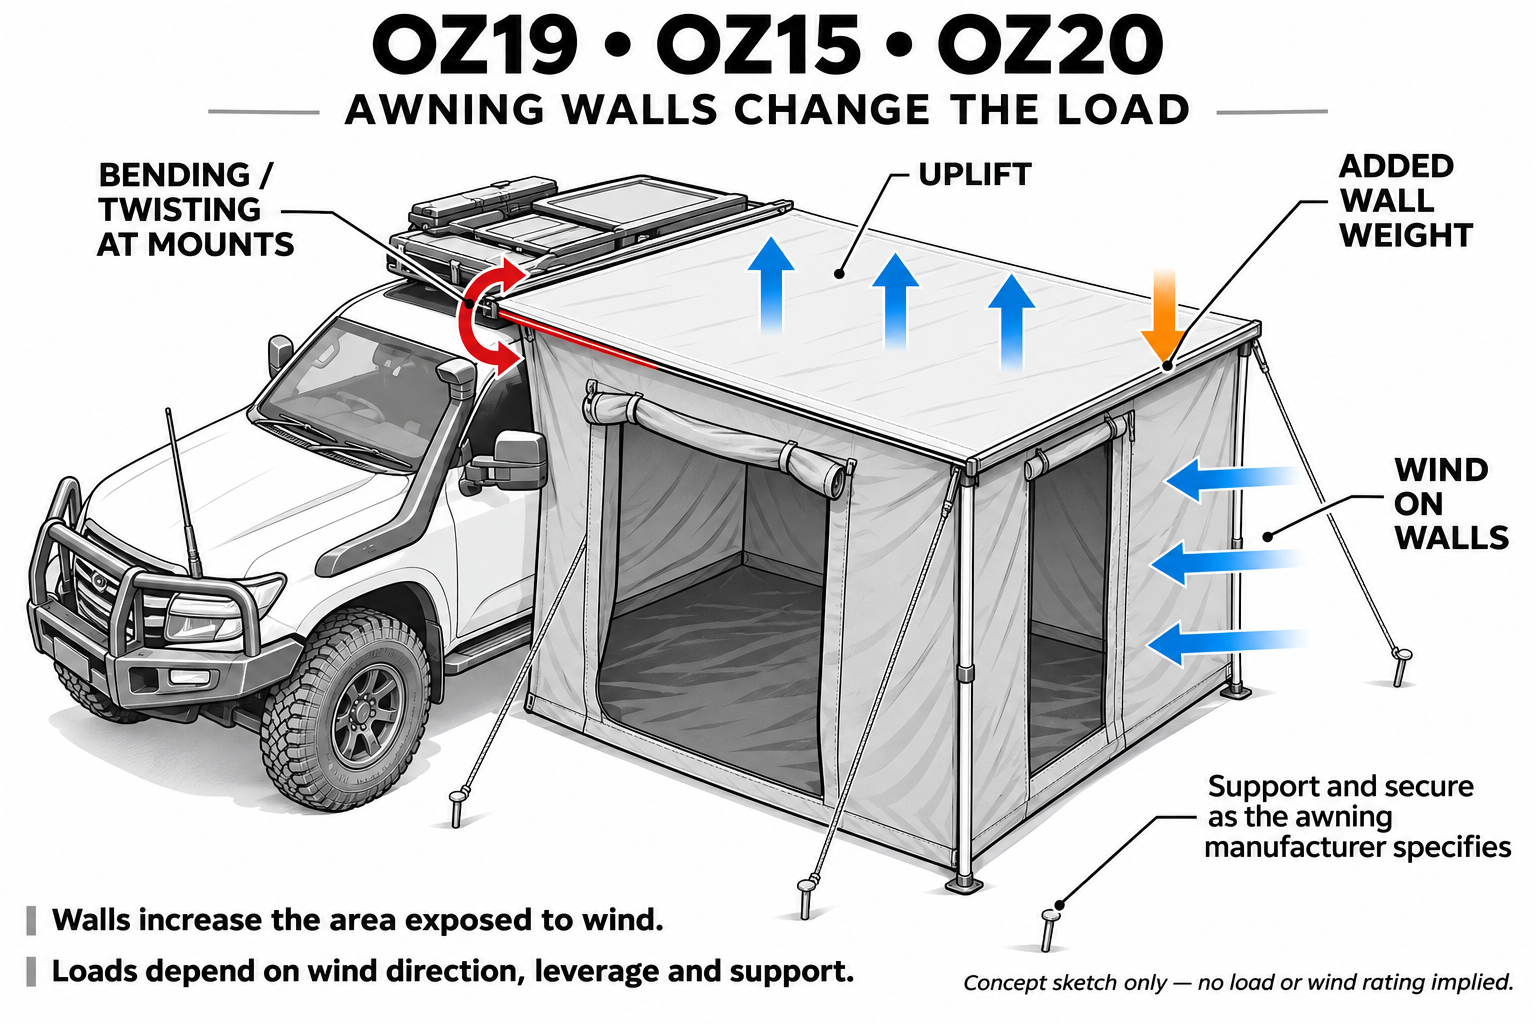
Twisting force, water pooling and bending moment
Awnings are sails under wind force. Adding awning walls changes the load on your mounting system.
Walls add weight and increase the surface area exposed to wind, creating sideways forces, uplift and potentially greater bending and twisting forces on the gutter mount brackets.
The turning force increases with the applied force and its perpendicular distance from the mounting point. Actual loads depend on wind direction, gusts, awning extension, wall configuration and ground supports; the awning’s weight alone does not indicate these forces.
Retract the awning before adverse weather arrives.
PRELIMINARY NOTES
(1) This product includes a range of accessories to facilitate the installation in different vehicle makes/models.
(2) Power tools are NOT REQUIRED to install our product/s. By using power tools you can damage your vehicle and the thread on the brackets.
(3) Avoid snapping the welded nut: Max Torque 25 Nm (18.439 ft-lbs) that means tighter than hand tight + 1/4- 1/2 a turn in most cases.
(4) These brackets are not compatible with any freestanding awning or to mount walls as any increase on the weight far from your gutter changes the bending moment (read attached documentation on product page)

Paso 1 - Verificar
Asegúrese de tener todo el hardware necesario para cada soporte.

Paso 2 - Limpiar
Limpie la canaleta y asegúrese de que no haya nada donde colocará el soporte.

Paso 3 - Proteger la canaleta
Coloque un trozo de papel en la pared del vehículo para protegerlo de arañazos.

Paso 4 - Placa de Canaleta
Coloque la pequeña placa de canaleta sobre la canaleta, apoyándola sobre la pared del vehículo.

Paso 5 - Coloque el caucho
Coloque el caucho adhesivo en el soporte, donde el soporte hará contacto con el vehículo (debajo de la canaleta - fig.3).

Paso 6 - Posicionar
Coloque suavemente el soporte debajo del canalón, asegurando la placa sobre el canalón.

Paso 7 - Tratamientos Preventivos
Recomendamos a los instaladores usar una buena cinta de silicona auto-fusible, sellador líquido, cinta de sellado de rosca de alta densidad o sellador anaeróbico si planea una instalación de bajo mantenimiento y duradera.

Paso 8 - Arandelas
Recuerde que la arandela de nylon está ahí para evitar tanto como sea posible el contacto entre los pernos y las arandelas SS304.

Paso 9 - Tenga en cuenta
Siempre asegúrese de que el perno que ha colocado no dañe la pared del cuerpo durante la instalación.
CONSEJO* Puede usar los pernos largos para aproximar la placa trasera y luego cambiar a los cortos.

Paso 10 - ¿Necesita un espaciador?
En algunos techos altos, el soporte necesita estar separado del cuerpo para mantenerlo vertical. Es suficiente colocar un delgado borde de goma para exteriores como en la imagen.

Paso 11 - Comience a apretar
Ahora puede comenzar a apretar el perno al soporte, tenga cuidado ya que dependiendo del perno utilizado, podría quedar cerca de la pared de la furgoneta.

Paso 12 - Termine
Todo debería estar listo ahora para instalar accesorios y volver a verificar la instalación.
